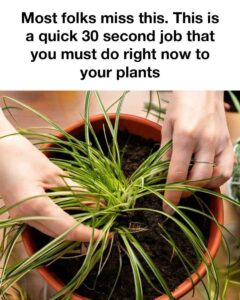
Most plant owners diligently water, fertilize, and occasionally repot their plants, but there’s one simple yet crucial task that often gets overlooked—aerating the soil. Over time, soil in potted plants becomes compacted due to watering, root growth, and natural settling. This compaction prevents oxygen from reaching the roots, making it harder for plants to absorb nutrients and water properly. The result? Stunted growth, poor drainage, and even root rot.
The good news? Aerating your houseplants is incredibly easy and takes just 30 seconds! By loosening the soil, you allow air, water, and nutrients to flow freely, giving your plants a healthier root environment. This tiny task can make a huge difference in your plant’s well-being—so grab a chopstick or a skewer and let’s get started!
What Is Aerating Your Houseplants?
Aerating your plants’ soil means loosening up the compacted soil in their pots to improve airflow, water drainage, and root health. Over time, soil naturally becomes compacted due to:
Aerating your plants’ soil means loosening up the compacted soil in their pots to improve airflow, water drainage, and root health. Over time, soil naturally becomes compacted due to:
Watering, which pushes soil particles together.
Organic matter breaking down.
Roots growing and taking up space.
Gravity slowly pressing the soil down.
This compaction prevents oxygen from reaching the roots, makes it harder for water to drain properly, and can even suffocate your plant.
Why Is Aeration Important?
Just like humans, plants need oxygen to survive. Their roots absorb oxygen from the soil, which is crucial for their growth and nutrient uptake. If the soil is too compacted, it can cause:
Just like humans, plants need oxygen to survive. Their roots absorb oxygen from the soil, which is crucial for their growth and nutrient uptake. If the soil is too compacted, it can cause:
Root rot due to poor drainage.
Nutrient deficiencies since roots struggle to absorb them.
Slower growth or even plant death.
Aerating the soil restores balance by allowing oxygen, water, and nutrients to reach the roots properly.
How to Aerate Your Houseplants (In Just 30 Seconds!)
The good news? This is one of the easiest plant-care tasks you can do. Here’s how:
What You Need:
A chopstick, pencil, skewer, or small stick (anything slim and non-damaging).
Step-by-Step Guide:
Gently poke holes into the soil using your chopstick or pencil. Insert it about 2-3 inches deep, depending on the size of the pot.
Move the stick slightly in a circular motion to create small air pockets. Avoid damaging the roots.
Repeat this process around the entire pot, spacing holes every 1-2 inches apart.
Water your plant after aeration to help distribute oxygen and nutrients evenly.
That’s it! 30 seconds and your plant’s roots will be breathing better instantly.
How Often Should You Aerate?
For best results, aerate your houseplants every 2-3 weeks, especially if you notice the soil becoming hard or water sitting on top instead of absorbing quickly.
For best results, aerate your houseplants every 2-3 weeks, especially if you notice the soil becoming hard or water sitting on top instead of absorbing quickly.
Bonus Tip: Use a Fork for Super Compacted Soil
If the soil is extremely compacted, use a small fork to gently loosen the top layer (about ½ inch). This prevents root damage while helping break up the hardened soil.
Final Thoughts
Aerating your houseplants is an easy, often overlooked task that can dramatically improve plant health. It takes less than a minute and helps prevent root rot, nutrient deficiencies, and poor water absorption. So grab a chopstick, poke some holes, and give your plant babies a breath of fresh air—they’ll thank you with lush, thriving growth! 🌱✨