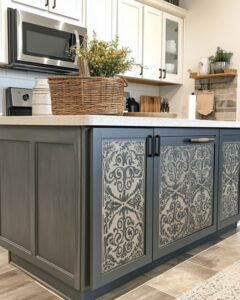
Transforming kitchen cabinets can redefine the entire look of your kitchen without the need for a costly renovation. With a bit of creativity and effort, you can achieve a customized and stylish kitchen that reflects your personal taste. Using stencils to redesign kitchen cabinets is an effective and affordable way to give your kitchen a fresh new look. This DIY project not only enhances the beauty of your kitchen but also allows you to express your individuality through artistic design.
When styling this DIY in your kitchen, it’s important to consider the overall aesthetic of your home. Opt for stencil designs that complement your existing decor. For a modern look, geometric patterns or sleek lines can add a contemporary touch. If your home has a rustic or farmhouse style, consider floral or nature-inspired stencils. The choice of color is also crucial; contrasting colors can make the designs pop, while monochromatic schemes provide a subtler effect. The key is to ensure coherence between the cabinets and the rest of the kitchen design elements, creating a harmonious and appealing space.
Stencil Design Kitchen Cabinet Makeover
Materials
Stencils of choice
Painter’s tape
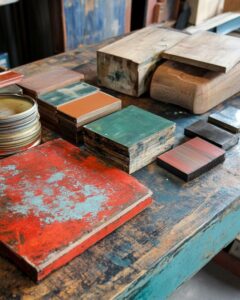
Paint (in desired colors)
Paintbrushes or foam rollers
Primer (optional, for better paint adhesion)
Sandpaper (fine grit)
Drop cloths
Cleaning cloths or sponges
Topcoat or sealant (for durability)
Painter’s tape
Paint (in desired colors)
Paintbrushes or foam rollers
Primer (optional, for better paint adhesion)
Sandpaper (fine grit)
Drop cloths
Cleaning cloths or sponges
Topcoat or sealant (for durability)
Directions
Remove all cabinet doors and hardware to work on a flat surface.
Clean the cabinet surfaces thoroughly to remove any dirt or grease.
If needed, lightly sand the cabinet doors to ensure the paint adheres well.
Apply a primer if your chosen paint requires it, and let it dry completely.
Place the stencil on the cabinet surface where you want the design. Secure it with painter’s tape to prevent shifting during painting.
Using a small paintbrush or foam roller, dab or roll the paint gently over the stencil. Avoid using too much paint to prevent bleeding under the stencil.
Carefully remove the stencil and let the design dry completely. Repeat the process for any additional designs or cabinets.
Once all stenciling is done and the paint is dry, apply a topcoat or sealant to protect the design and add durability.
Reattach the cabinet doors and hardware.
Step back and admire your newly transformed kitchen cabinets!
Variations & Tips
There are numerous variations you can explore with this stencil design DIY. For a personalized touch, you can create or purchase custom stencils featuring unique patterns or monograms. Experiment with different painting techniques, such as ombre effects or layering colors for added depth. If you’re feeling adventurous, try mixing and matching different stencil patterns across different cabinets to create a dynamic and eclectic look. Always test your stencil and paint on a small, inconspicuous area first to ensure you are satisfied with the results before committing to the entire project.