There’s something enchanting about the art of decoupage. It’s a craft that allows you to transform ordinary objects into works of art, adding a touch of personal flair to your living space. In recent years, the popularity of decoupage has soared, with more and more DIY enthusiasts embracing the potential of this versatile art form. While decoupage is commonly associated with decorative items such as vases, picture frames, and furniture, it may come as a surprise to some that it can also be applied to kitchen countertops. Decoupaging your kitchen counter is not only a creative way to rejuvenate your kitchen’s aesthetic, but it also provides a budget-friendly alternative to traditional countertop renovations.
Kitchen countertops can endure a lot of wear and tear over the years, and replacing them can be a costly and time-consuming endeavor. Whether you’re looking to give your kitchen a fresh new look, or simply want to indulge your artistic side, decoupaging your kitchen counter is a fun and affordable solution. The process is straightforward and can be accomplished with materials that are readily available and cost less than $10. With a little creativity and effort, you can transform your kitchen counter into a delightful masterpiece, brimming with character and charm. So, let’s dive into the exciting world of decoupage and explore the steps involved in creating your very own DIY decoupaged kitchen counter recipe.
Step 1: Gather Your Materials
Before you begin, it’s important to gather all the necessary materials for your decoupage project. The good news is that decoupage supplies are relatively inexpensive and can be easily found at craft stores or online. You’ll need a few basic items, including decoupage glue (such as Mod Podge), a foam brush, a pair of scissors, and decorative paper or fabric of your choice. Feel free to select a design that complements your kitchen’s decor, whether it be a floral pattern, vintage print, or an abstract motif. Additionally, you’ll want to have some clear acrylic sealer on hand to protect the finished surface.
Step 2: Prepare Your Kitchen Counter
Before you can start the decoupage process, it’s crucial to properly prepare your kitchen counter. Start by thoroughly cleaning the surface with a mild detergent and water to remove any grease, dirt, and grime. Allow the counter to dry completely before proceeding. If your countertop has any uneven areas or damage, you may need to sand it lightly with fine-grit sandpaper to create a smooth surface. Once your counter is clean and smooth, you’re ready to begin the transformation.
Step 3: Cut and Arrange Your Decorative Material
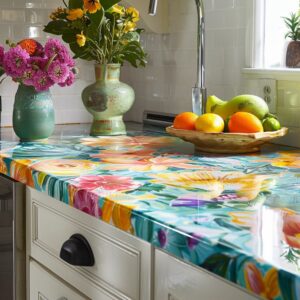
The next step is to cut out pieces of decorative paper or fabric to fit the surface of your kitchen counter. You can either cover the entire counter with a single design or get creative by arranging a collage of different patterns and colors. Take your time to arrange the cut-outs on the counter until you’re satisfied with the overall layout. This is your chance to let your artistic vision come to life, so don’t be afraid to experiment with different arrangements.
Step 4: Apply Decoupage Glue and Decorative Material
Once you’ve finalized the arrangement of your decorative material, it’s time to start the decoupage process. Using the foam brush, apply a thin and even coat of decoupage glue to a small section of the countertop. Carefully place the cut-out material onto the glued surface, smoothing out any air bubbles or wrinkles with your fingers or a flat tool such as a credit card. Repeat this process for each piece of decorative material, working in small sections until the entire counter is covered. Allow the glue to dry for the time specified on the product label.
Step 5: Seal and Protect Your Decoupaged Counter
After the decoupage glue has dried, it’s important to seal and protect your newly decoupaged kitchen counter. To do this, apply a clear acrylic sealer over the entire surface using a clean foam brush. The sealer will provide a protective coating that helps prevent scratches, stains, and moisture damage. Make sure to apply the sealer in thin, even coats, and allow each coat to dry completely before applying the next. For best results, we recommend applying at least two to three coats of sealer, paying close attention to the edges and corners of the counter.
As the final coat of sealer dries, you may notice a slight shine or gloss on the surface. This is normal and will enhance the overall appearance of your decoupaged counter. Once the sealer is fully dry, your DIY decoupaged kitchen counter is complete and ready for use! Be sure to gently clean the surface with a soft cloth and mild detergent to keep it looking beautiful for years to come.
In conclusion, decoupaging your kitchen counter is a unique and cost-effective way to add a touch of personality to your kitchen. With just a few simple supplies and a little creativity, you can transform an ordinary countertop into a work of art that reflects your style and taste. Best of all, this DIY project can be accomplished for less than $10, making it an affordable and accessible option for anyone looking to revamp their kitchen decor. Whether you’re a seasoned DIY enthusiast or a beginner looking to try something new, decoupage is a fun and rewarding craft that offers endless possibilities for customization. So go ahead and unleash your inner artist—your kitchen counter is the perfect canvas!